 This is guest post by Becky Striepe
from Glue and Glitter
Growing food is sort of a non-stop adventure, isn’t it?
Just when everything’s planted and flourishing…
…the change in seasons means it’s time to start your garden over with a new round of seeds and seedlings.
Like Mike has mentioned before, you might think you’ll remember what you planted where, but unless you label your pots, chances are you’ll end up with at least one or two mysteries sprouting up.
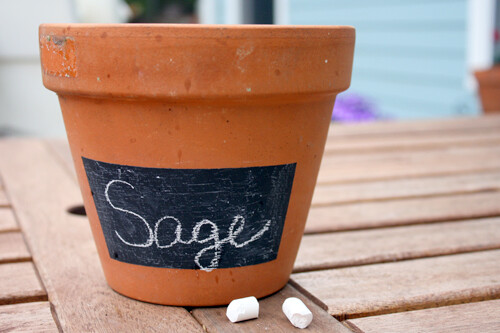
A container garden is no different. Rather than having to keep track of a bunch of plant markers, you can use chalkboard paint to create a changeable label for your potted herbs and veggies. It’s easy as pie!
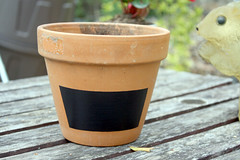
Here’s how to make your own chalkboard paint pot
- Materials
- Chalkboard paint. You can pick up a pint at the store or make your own.
- A terra cotta pot. Use a dry rag to wipe it clean of any debris.
- A paint brush. Something medium-sized will do.
- Masking tape or decals. I went with a plain rectangle, but you can use decals if you want your chalkboard label to have a fun shape, like a heart or a star.
- Chalk. White will do, or you can use fun colored chalk!
- Directions
- Tape off your design. If you’re doing a square, you want to be super careful to keep the top and bottom edges parallel to the top and bottom of the pot. That might mean ever so slightly curving the tape as you go around. Take your time with this step. When you’re all done taping, take an extra minute to make sure it’s smoothed down really well, so you won’t have any smudges.
- Shake up your chalkboard paint really well. Not only does shaking keep the color even, but it distributes the tiny grains that make chalkboard paint writeable.
- Grab your brush, and paint! I gave my pot 2 coats, leaving about 10 minutes drying time in between. It will take 2 or 3 coats to get it looking nice and even.
- Don’t wait too long to remove your tape, or you’ll risk removing the paint along with it. Maybe 10 or 15 minutes is a good waiting time after you finish your last coat. To remove the tape, very slowly and carefully peel it away from the pot, being careful not to let any painty parts of the tape touch the pot, since you won’t be able to get that paint off of the porous surface once it’s on there.
- Let your pot dry overnight, then take a piece of chalk and rub the side all over where you painted to prime your chalkboard label. Wipe off the excess with a clean rag, and you’re ready to write on your pot!
About Becky
Becky Striepe is a vegan crafter living in Atlanta, Georgia. Her mission is to make vegan food and eco-friendly crafts accessible to anyone who wants to give them a go. She’s also site director at Eat Drink Better, a site dedicated to exploring sustainable, ethical food choices. You can follow Becky on Twitter or find her on Facebook and Pinterest!
Images courtesy of Glue and Glitter on Flickr.


There was a lady on the Nate show the other day says you don’t have to paint any more they have chalk board sticky paper.
That’s lazy 😉
I want to see sticky paper try and stay stuck to a damp terracotta pot.